 Feature
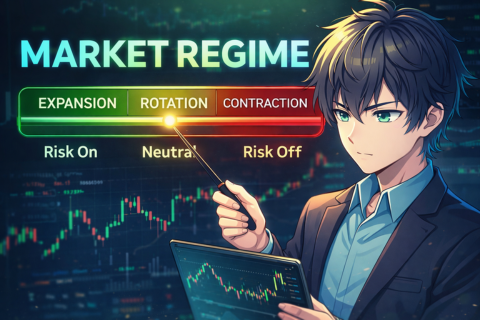
Market Regime Indicator: How StockJelli Reads the Room
Every momentum trader knows the feeling: you find a great setup — strong volume, clean breakout, solid SJ Score — and it still fails. Not because the setup was bad, but because the broader market was working against you. A stock breaking out in a healthy bull market behaves very differently from the same stock breaking out while indices are selling off.
This is the problem StockJelli's Market Regime Indicator is designed to solve. It reads the overall market environment and classifies it into one of four states, giving you critical context before you evaluate any individual ticker. And for subscribers, it goes a step further — the regime directly adjusts SJ Scores so that the numbers reflect the current environment, not just the individual move.
The Four Regimes
StockJelli classifies market conditions into four distinct regimes. Each represents a different environment with different implications for momentum trading:
🟢 Expansion
This is the best environment for momentum traders. The broader index is trending up, and a large number of individual stocks or crypto tokens are hitting momentum thresholds simultaneously. Breadth is strong — it's not just one or two names carrying the market; the move is broad-based.
During Expansion, momentum setups have the highest probability of follow-through. Breakouts tend to hold and extend because there's genuine demand across the market. If you see eight or more stocks qualifying on the screener while the NASDAQ is up 1%+, you're likely in Expansion territory.
SJ Score impact: Scores are boosted by +8% during Expansion. The environment supports continuation, so the same setup objectively has a higher probability of working — and the score reflects that.
🟡 Rotation
Rotation is the "be selective" regime. The market is sending mixed signals — maybe the index is flat or slightly positive, but only a moderate number of stocks are qualifying. Or the index is strong but momentum is concentrated in just a few names rather than broad-based.
This often happens during sector rotation: money is flowing out of one area and into another, but the overall market isn't clearly trending. Some momentum setups will work, but the hit rate is lower than in Expansion. Selectivity matters more here — stick to your highest-conviction setups and don't force trades.
SJ Score impact: Scores are unchanged during Rotation. The environment is neutral — neither boosting nor penalizing momentum.
🟠 Caution
Caution means the index is weak or flat, but there are still individual movers showing up on the screener. This creates a divergence — stocks or crypto are breaking out against the broader trend. Some of these moves are genuinely strong (relative strength leaders that will continue even if the market is soft), but many are traps that will fade once buying pressure dries up.
During Caution, momentum may not sustain. A stock that gaps up 8% in a bearish market might hold those gains for an hour before the broader selling pressure drags it back down. This is the regime where tight stops, smaller position sizes, and quick profit-taking are most important.
SJ Score impact: Scores are reduced by -8% during Caution. The setup might look identical to an Expansion setup on paper, but the hostile market environment lowers the probability of follow-through — and the score adjusts to reflect that reality.
🔴 Contraction
Contraction is the risk-off environment. The index is weak and very few individual tickers are hitting momentum thresholds. The screener is quiet because there's nothing genuinely moving — the market is either selling off broadly or trading in a tight, low-conviction range.
This is the regime where the best trade is often no trade. Momentum strategies have the lowest hit rate during Contraction because there's no underlying demand to carry breakouts forward. The few movers that do appear are often short-lived spikes in otherwise declining markets.
SJ Score impact: Scores are reduced by -15% during Contraction. This is the largest adjustment, and it's intentional. Even a setup that looks strong by its individual metrics is swimming upstream in a Contraction environment.
How It's Calculated
The Market Regime Indicator isn't based on a single number or indicator. It's computed from three inputs that StockJelli already tracks in real time:
1. Index trend. For stocks, this is the NASDAQ/QQQ percentage change — the number you see in StockJelli's header. For crypto, it's Bitcoin's 24-hour change. If the index is up 1%+, the trend is bullish. Between -0.5% and +1%, it's neutral. Below -0.5%, it's bearish. This provides the macro direction.
2. Breadth. This measures how many individual tickers are qualifying on the screener right now — passing StockJelli's minimum thresholds for price change, volume, and market cap. More qualifiers means stronger breadth. For stocks, 8+ qualifiers indicates strong breadth; fewer than 4 indicates weak breadth. For crypto (which naturally has more movers), the thresholds are higher: 12+ for strong, fewer than 6 for weak.
3. Spread. This is the gap between the top mover and the 5th mover on the screener. A narrow spread means momentum is evenly distributed — lots of stocks moving by similar amounts. A wide spread means one or two names are dominating while the rest lag, which suggests narrow leadership rather than broad strength.
These three inputs are combined using a decision matrix that maps every combination of index trend + breadth + spread to one of the four regimes. No new API calls are needed — the regime is computed from data StockJelli already has, which means it updates in real time alongside the screener.
The Decision Matrix
Here's a simplified view of how index trend and breadth interact to determine the regime:
- Bullish index + strong/moderate breadth → Expansion
- Bullish index + weak breadth → Rotation (narrow rally)
- Neutral index + strong breadth → Expansion (movers despite flat market)
- Neutral index + moderate breadth → Rotation
- Neutral index + weak breadth → Caution
- Bearish index + strong/moderate breadth → Caution (divergence)
- Bearish index + weak breadth → Contraction
The spread value acts as a tiebreaker in borderline cases. When the market is closed, the regime defaults to the last known state with a bias toward Rotation (neutral), since stale data shouldn't drive aggressive scoring adjustments.
Why Adjusting SJ Scores Matters
An SJ Score without market context is like a weather forecast without knowing the season. A 75°F reading means something very different in July versus January.
The same principle applies to momentum. A stock scoring a 7 on the screener during Expansion is in an environment where 7s tend to follow through. That same stock scoring a 7 during Contraction is in an environment where most momentum fades. The setup looks identical on paper — same price change, same volume, same chart pattern. But the probability of success is materially different because of the market around it.
By applying regime multipliers to SJ Scores, StockJelli bakes market context directly into the number. You don't have to remember to "discount" scores during weak markets or "trust" them more during strong ones — the score already reflects the environment. A 7 during Expansion might display as a 7.5. A 7 during Contraction might display as a 6. The relative ranking between tickers stays the same; it's the absolute confidence level that shifts.
This is a subscriber-only feature because it represents a meaningful analytical advantage. Free users see the regime label (Expansion, Rotation, Caution, or Contraction), which is valuable context on its own. Subscribers see the label plus the adjusted SJ Scores, giving them a more nuanced view of each setup's probability in the current environment.
Stocks vs. Crypto Regimes
The regime is computed separately for stocks and crypto, because the two markets have fundamentally different dynamics.
For stocks, the regime is anchored to NASDAQ/QQQ as the index trend. This makes sense because most momentum stocks are growth-oriented and correlate with the tech-heavy NASDAQ more closely than the S&P 500. Stock breadth thresholds are lower because the universe of qualifying stocks on any given day is smaller (most don't meet the 4%+ and 1M+ volume minimums).
For crypto, the regime is anchored to Bitcoin. As we covered in our article on how crypto and stock momentum differ, BTC acts as the index for the entire crypto market. When BTC moves significantly, altcoins tend to follow with a 12–48 hour lag. Crypto breadth thresholds are higher because the crypto universe is larger and more volatile — it's normal to see 10+ tokens qualifying even on an average day.
Because the regimes are computed independently, it's entirely possible to see stocks in Expansion while crypto is in Caution — or vice versa. The two markets don't always move in sync, and the regime indicator reflects that reality rather than forcing them into the same bucket.
How to Use the Regime in Your Trading
The regime indicator isn't a buy or sell signal. It's context that should inform your position sizing, selectivity, and expectations:
During Expansion: This is when momentum strategies have the highest hit rate. You can be more aggressive with the number of positions you take (while still following position sizing rules). Breakouts are more likely to hold, and pullbacks tend to be bought. Trust the screener data — it's working in a supportive environment.
During Rotation: Be selective. Not every setup on the screener will work. Focus on the highest SJ Scores and the strongest volume confirmation. Reduce the number of simultaneous positions and tighten your criteria. Some sectors are working while others aren't — figure out which before committing capital.
During Caution: Reduce position sizes. Tighten stop-losses. Take profits faster. If you enter a momentum trade and it doesn't start working quickly, consider cutting it early rather than waiting for your full stop to trigger. The market environment is actively working against continuation, so give trades less room and expect a lower hit rate.
During Contraction: Consider sitting out entirely, or trading with minimal size. The screener may still show entries, but the probability of follow-through is lowest in this environment. Sometimes the best trade is no trade. Use Contraction periods for review, planning, and preparation — not aggressive position-taking.
The Market Regime Indicator gives you something most screeners don't: context. By classifying conditions into Expansion, Rotation, Caution, or Contraction — and adjusting SJ Scores accordingly — StockJelli helps you understand not just what's moving, but whether the environment supports that movement continuing. Free users see the regime label. Subscribers get regime-adjusted SJ Scores that bake market context directly into the data.
Built from Data You Already See
One of the design principles behind the Market Regime Indicator is that it doesn't require any new data sources, proprietary feeds, or external APIs. It's computed entirely from information StockJelli already tracks: the index percentage in the header, the number of qualifying tickers on the screener, and the distribution of their moves.
This means the regime updates in real time as the session progresses. The market might open in Rotation and shift to Expansion by 10:30 AM as breadth builds. Or a strong open might fade into Caution by midday as the index reverses. The regime reflects what's happening now, not a static snapshot from the morning.
It's a simple concept — the same data, viewed through a different lens — but it adds a layer of analytical depth that changes how you interpret every other number on the screener.
StockJelli is an educational tool. This article is for informational purposes only and does not constitute financial advice.
See what's moving right now
Open the Screener